After a year of use and abuse, my cute little case has ended up looking beaten, battered and rather bedraggled:
SO, like any good little Crafty Geekling out there, I decided to replace the picture on my case... Then decided that decoupage was for certain the best way to do it! Having never decoupaged anything before, I quickly set about half-assedly Googling the supplies and steps of said process. Feeling reasonably confident and ready to test my new mad skills, I gathered my supplies -- Fine-grit sand paper (150 grit, for anyone who cares), New and Improved Cute Pictures, glue and a glass bottle with a lid that seals tightly.
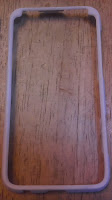
Now, for the fun part... Sanding down the case, to remove the uneven remaining paint. This took entirely too long for my liking, but was made more enjoyable by the watching of several episodes of Phinneas and Ferb with my kids. The end result was a nice, blank white case:
Ahhh.... A clean slate... After answering many questions from my kids as to why I wanted a white case when my old one had been so cute, I moved on.
I combined equal parts of glue and water in my bottle that seals tightly...
...and shook the heck out of it!
The resulting concoction looked so milky white, my 5.5-year-old son asked if he could drink it. The obvious answer is: NO - DON'T DRINK THE GLUE-WATER!Next I cut out the pictures,
then laid them out on my case, adjusted them until I was happy, and took a picture of the case so I could remember how I had placed them:
That done, I painted on a coat of the glue-water over both halves of my case, re-placed the pictures, then settled in for the exciting business of watching the glue dry... Which is just about as exciting as watching paint dry, but not quite on a level with watching grass grow.
Once the first coat dried, I brushed on another coat of the glue-water, which initially gave a satisfactorily glossy appearance to my case:
Then had the audacity to dry with more of a matte appearance, leaving the finished product looking a little something like this:
I'm not quite done yet -- I do need to add more coats of the glue-water to better seal and protect the pictures, but this seemed like a good point in the project to share, since I'm not sure how many watching-glue-dry sessions I'll have to endure before I can really and truly call this project complete.All in all, this has been a fun craft... But here's a few things I've learned:
- Watching glue dry ain't all it's cracked up to be! (Seriously, though, just make sure you have a safe, flat place for your project to dry and it can fend for itself).
- Craft stores do sell a Decoupage solution. I'm not sure how it compares to this fancy glue-water of mine. I was hoping for a glossy finish... Maybe the store-bought solution would have provided that.
- The pictures faded as the glue-water absorbed and dried -- I used my home ink jet printer and regular printer paper. I will try a different medium next time; perhaps magazine pics or pics done on a laser printer...
- This is super easy, but time-consuming!! You will definitely want to make sure your patience is among your craft supplies on this one (I was only able to do one glue coat in a day, to allow it to fully dry).


No comments:
Post a Comment